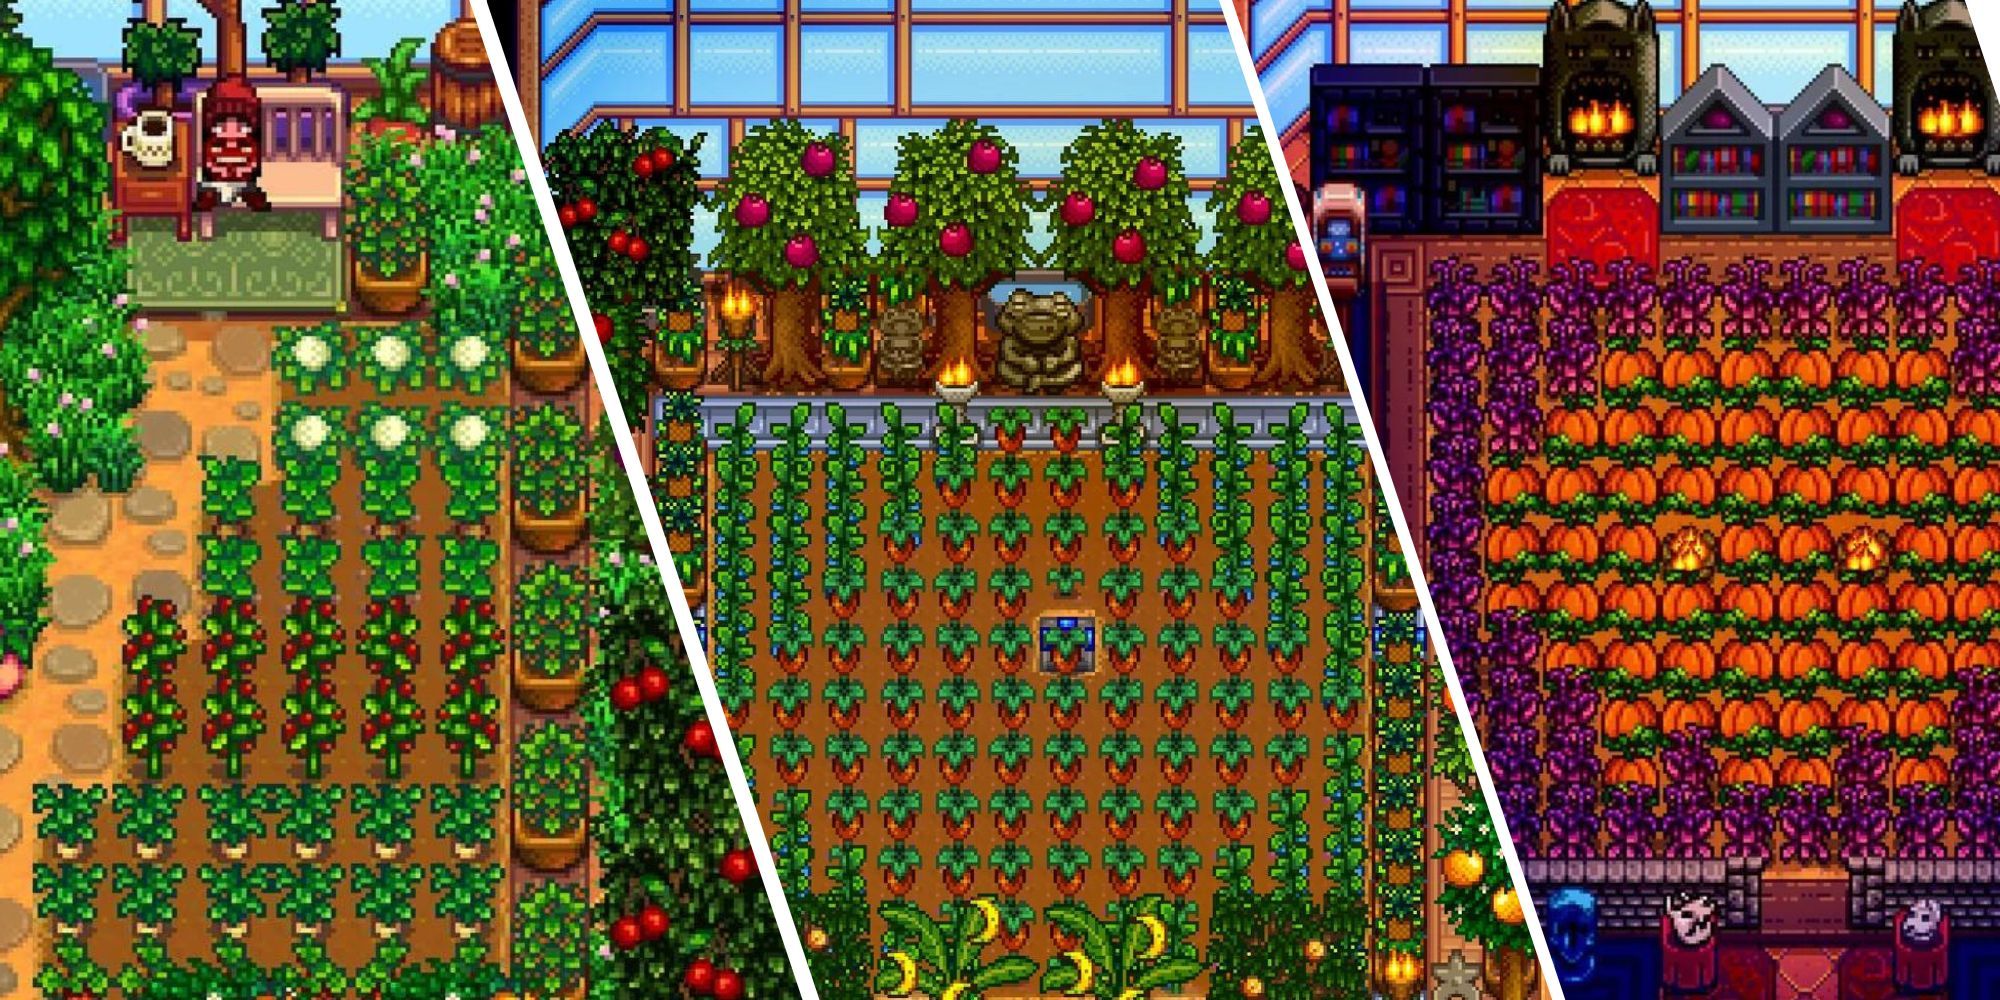
The greenhouse in Stardew Valley, a rather special building you unlock, stands as a truly incredible resource for any farmer looking to boost their farm's output. It offers a unique space where you can grow almost anything, regardless of the season outside. This means a steady stream of valuable crops and fruits, which, you know, can really make a difference to your daily earnings. Many players, just like you perhaps, are quite keen to figure out the best ways to set up this valuable area once they get it open on their main save.
Thinking about your greenhouse layout is a pretty important step, especially if you want to get the most out of this wonderful building. What you plan to grow inside, whether it's for maximum earnings or simply for a beautiful display, will influence your choices. There are, as a matter of fact, quite a few different ways to arrange things in there, and the ideal setup really depends on what you hope to achieve with your farming efforts.
This comprehensive guide aims to help you explore the perfect greenhouse layout, suggesting some excellent crops and fruit trees to consider. We will also touch upon the benefits that fertilizers can bring to your produce. If you are, in fact, interested in making your greenhouse work as efficiently as possible, then you are in the right place to get some helpful ideas for your farm.
Table of Contents
- Understanding the Stardew Valley Greenhouse
- Key Elements for an Optimal Greenhouse Layout
- Designing Your Perfect Greenhouse Layout
- Practical Tips for Greenhouse Management
- Frequently Asked Questions About Greenhouse Layouts
Understanding the Stardew Valley Greenhouse
The greenhouse is, quite literally, a game-changer for your Stardew Valley farm. Once you repair it, usually by completing the Pantry bundles in the Community Center, you gain access to a space where the seasons just do not matter. This means you can grow summer crops in winter, or spring crops in fall, which is rather convenient. It is a fantastic way to keep your income flowing consistently throughout the year, especially during those colder months when outdoor farming is not an option.
Many players, myself included, feel a real sense of accomplishment when they finally get this building up and running. It feels like a big step forward in your farming career, a true milestone, you know. The ability to cultivate any crop or fruit tree at any time really opens up new possibilities for how you approach your farm's economy and overall design. It's almost like having a secret garden that never sleeps.
To really use the greenhouse to its full potential, a little bit of careful thought about its internal arrangement can go a long way. This space, while not enormous, can become incredibly productive with the right planning. We are talking about making every single tile count, so you can harvest as much as possible, or simply create a visually pleasing space that brings you joy. It is, in a way, about making smart choices for your long-term farming goals.
Key Elements for an Optimal Greenhouse Layout
When you set out to design the very best greenhouse layout in Stardew Valley, there are a few core elements you will want to keep in mind. These components work together to ensure you get the most out of your valuable space, whether that means maximizing your profits or just creating a lovely, productive area. Getting these elements right is, basically, the foundation of a truly effective greenhouse setup.
A highly efficient greenhouse layout can, for instance, accommodate as many as 18 fruit trees and a remarkable 116 regular plants. This kind of setup also typically uses six iridium sprinklers to handle all the watering needs. Achieving this balance requires some clever placement and a good understanding of the greenhouse's unique characteristics. It is, you know, about fitting everything in just right.
Thinking about these key numbers – 18 fruit trees, 116 plants, and 6 iridium sprinklers – gives you a clear target for an optimized space. This combination is often considered the gold standard for players looking to generate significant wealth from their greenhouse. It's really about making sure no valuable space goes to waste, and that your plants are always well-hydrated, too.
Fruit Tree Placement: A Strategic Approach
The fruit tree part of the greenhouse layout requires, perhaps, a little bit more planning than you might initially expect. This is because fruit trees have specific requirements for where they can grow. You cannot, for instance, just plant them anywhere you like within the greenhouse's borders. There are some rules to follow to ensure they thrive and produce fruit.
One very important rule to remember is that fruit trees cannot be planted in the corners of the greenhouse. These specific spots simply will not allow a fruit tree to grow. This means you need to be mindful of the perimeter, placing your trees carefully along the outer edges of the interior space, avoiding those tricky corner tiles. It is, actually, a common mistake for new players, so being aware of it helps a lot.
Despite this small restriction, it is absolutely possible to grow as many as 18 fruit trees inside your greenhouse. This number is quite significant, as fruit trees produce fruit daily once mature, offering a consistent and valuable income stream. They also, rather interestingly, always display their summer sprite when planted in the greenhouse, regardless of the actual season outside, which adds a nice touch of consistent greenery.
To fit all 18, you will need to place them strategically along the outer perimeter, making sure there's an empty tile surrounding each sapling for it to mature. This typically means placing them one tile in from the very edge of the tillable soil, leaving a clear path around them. This precise placement is, in fact, what allows for maximum fruit tree density without hindering their growth.
The consistent production from these fruit trees is a major reason why the greenhouse is such a great resource. Imagine, if you will, harvesting a fresh batch of peaches or pomegranates every single day, even in the depths of winter. This reliable output can provide a solid financial foundation for your farm, allowing you to invest in other areas or simply enjoy your earnings, too.
Planting Areas: Maximizing Your Harvest
Beyond the fruit trees, the greenhouse offers a generous amount of space for regular crops, specifically 116 plantable tiles. This is where you can truly diversify your income and grow those high-profit, continuous harvest crops that are not limited by seasons. Filling these spots wisely is, you know, key to making the most of your greenhouse's potential for profit.
When considering what to plant in these 116 spots, think about crops that either fetch a high price or produce multiple harvests from a single planting. Strawberries, blueberries, and cranberries are popular choices because they keep producing after their initial harvest. Ancient Fruit and Sweet Gem Berries, if you have them, are also excellent options for their incredible value, basically.
The beauty of these 116 plant spots is that you can mix and match based on your current needs or preferences. You might dedicate some rows to crops for cooking, others for gifting, and the majority for pure profit. This flexibility means your greenhouse can adapt as your farm progresses and your goals shift, which is quite handy, you know.
Making sure every single one of these 116 tiles is used is a primary goal for many farmers aiming for maximum efficiency. Each empty tile represents a lost opportunity for income or resource generation. So, planning your sprinkler placement and crop layout to cover every possible spot is, actually, a smart move for getting the most out of your greenhouse space.
The consistent growth environment means you do not have to worry about crop destruction due to season changes or bad weather. This reliability is a huge benefit, as it reduces the risk associated with farming and allows for predictable income. It is, in some respects, a very safe and dependable way to grow your wealth in the game.
Sprinkler System: The Iridium Advantage
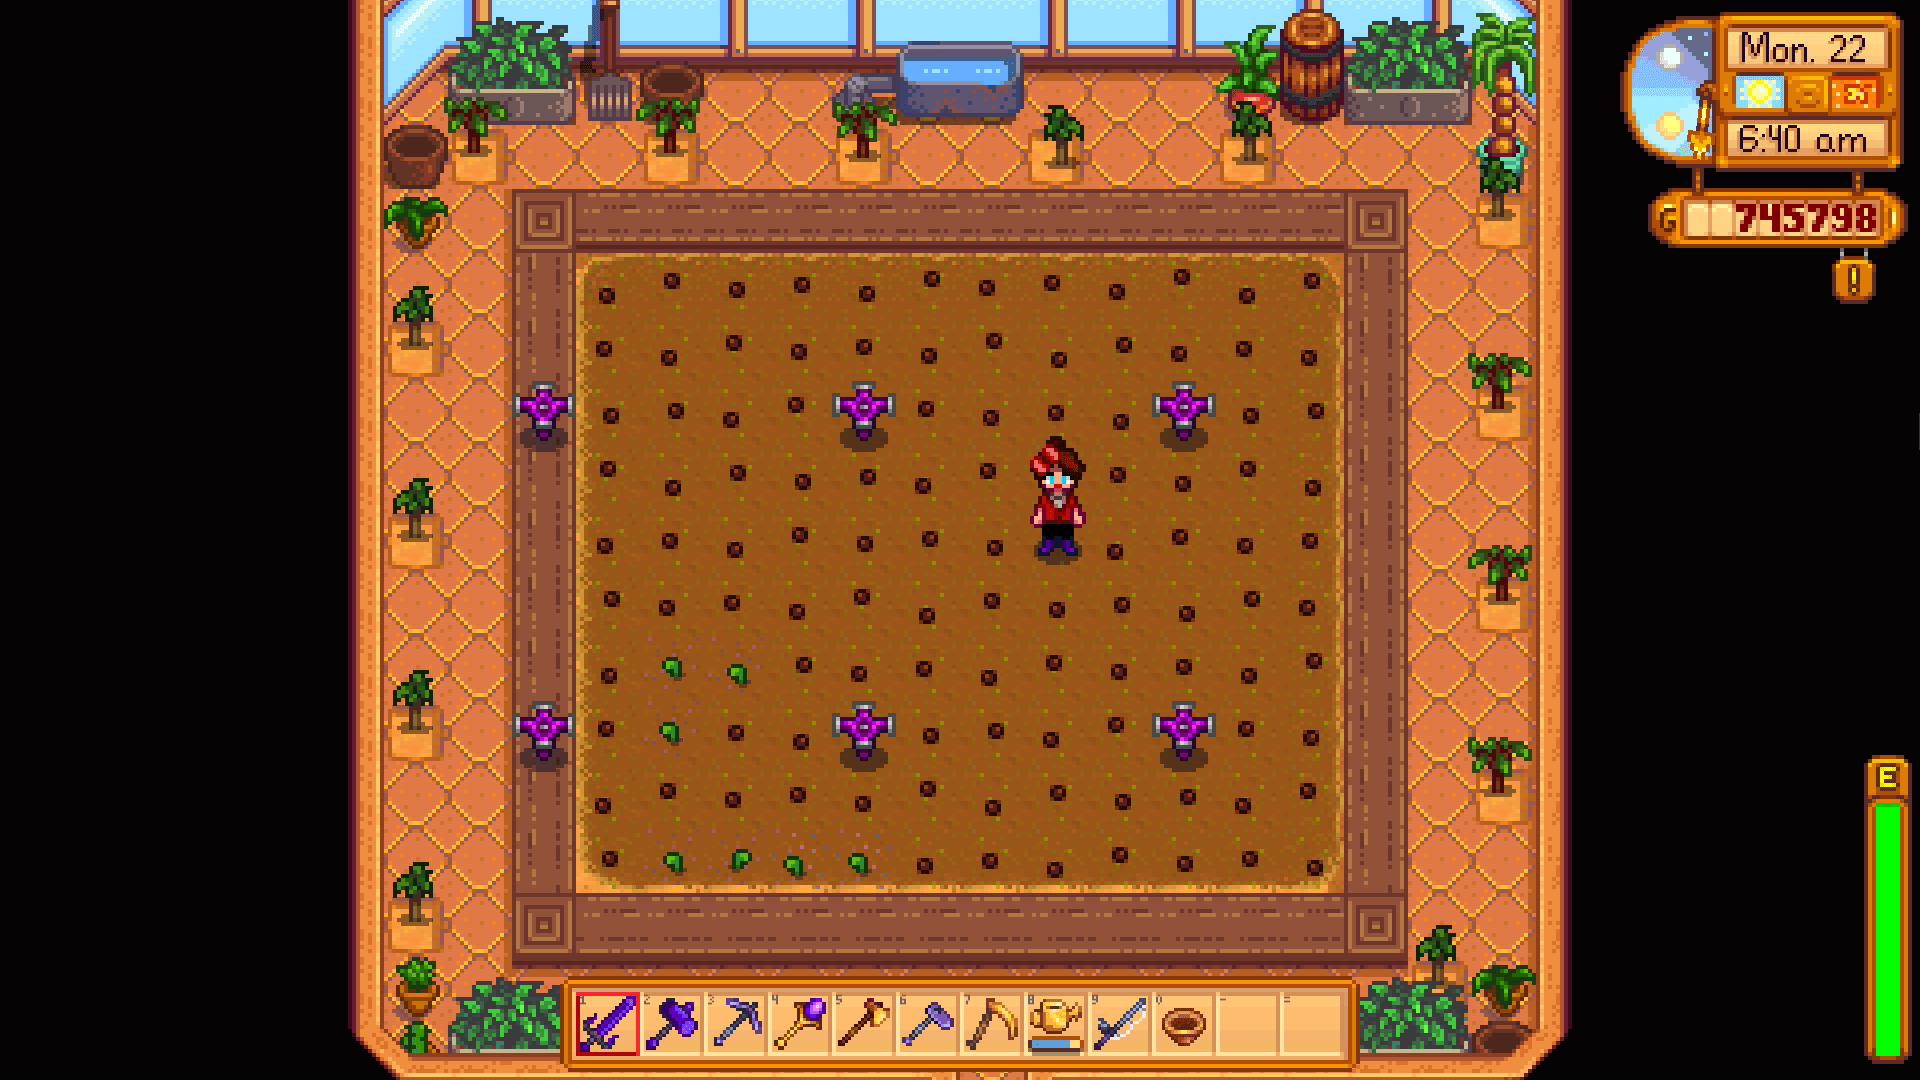
To efficiently water all those plants and fruit trees, the optimal greenhouse layout relies on six iridium sprinklers. These sprinklers are, arguably, the best watering devices in the game, capable of watering a 5x5 area (24 tiles around the sprinkler itself). Their wide coverage makes them perfect for handling the large number of crops you can fit into the greenhouse.
Placing these six iridium sprinklers strategically is what allows you to cover all 116 plantable tiles without needing to manually water anything. This saves you a significant amount of time and energy each day, which you can then spend on other farm activities, like fishing, mining, or interacting with townsfolk. It is, quite simply, a huge convenience for any busy farmer.
A common arrangement for these sprinklers involves placing them in specific spots within the tillable soil area to ensure full coverage. You might place one in the center, and then others around it to extend the watered area to the edges. This precise placement is, in fact, what makes the 116-plant capacity so manageable, as you never have to worry about dry patches.
The investment in iridium sprinklers is well worth it for the greenhouse. While they require some valuable resources to craft, the time saved and the consistent crop yield they enable quickly pay for themselves. They are, basically, a cornerstone of any truly optimized greenhouse operation, allowing for hands-free watering and maximum productivity.
Having a fully automated watering system means you can just plant your seeds and then forget about watering them, letting the sprinklers do all the work. This level of automation is, really, what helps players use their greenhouse to its absolute maximum potential, turning it into a low-maintenance, high-reward area on their farm.
Designing Your Perfect Greenhouse Layout
When it comes to designing your greenhouse layout, you have a wonderful opportunity to express your creativity. Your choices will depend on your personal farming goals, whether you are aiming for the biggest possible profit or if you prefer a space that is more pleasing to the eye. There is, actually, no single "right" way to do it, just what works best for you and your farm.
Some players might want to fill their greenhouse with trellis crops, for instance, which require special placement but can be quite profitable. Others might focus on a mix of different crops and fruit trees to balance income with variety. The key is to consider what you want to get out of your greenhouse and then plan accordingly. It is, you know, about making it truly yours.
The best greenhouse layouts in Stardew Valley often involve planting the 18 saplings along the outer perimeter of the interior space, using those six iridium sprinklers, and then filling the remaining 116 spots with seeds. This setup is widely recognized for its efficiency, but you can always tweak it to suit your specific desires. It's more or less a starting point for optimization.
The Profit-Driven Greenhouse
If your main goal is to make as much money as possible from your greenhouse, then your layout choices will definitely lean towards high-value, continuous-harvest crops. This approach prioritizes efficiency and maximizing every single tile for its earning potential. It's all about getting the biggest return on your planting investment, basically.
For a profit-driven greenhouse, you will absolutely want to plant those 18 fruit trees, choosing varieties that sell for a good price, like Ancient Fruit or Starfruit trees if you have them, or even just regular fruit trees like peaches and pomegranates. Their daily output adds up very quickly, providing a steady income stream that is quite reliable. This consistent money flow is, you know, a major benefit.
The 116 plant spots should then be filled with crops that offer the highest gold per day. Ancient Fruit is a very popular choice here, as it continuously produces and sells for a high price. Other options might include Sweet Gem Berries (though they do not regrow) or crops like Hops or Coffee Beans, which can be processed further for even more profit. It's, in a way, about smart crop selection.
Every decision in a profit-driven greenhouse is about optimizing output. This means using fertilizers to increase crop quality, ensuring all 116 spots are always planted, and harvesting regularly. The aim is to turn your greenhouse into a money-making machine, a consistent source of wealth that fuels your other farm projects, too.
This kind of layout is perfect for players who want to quickly accumulate wealth, perhaps to buy expensive farm buildings, complete community upgrades, or purchase rare items. It is a very effective strategy for moving forward in the game's economy, and it really shows the return on your hiring investment, in a manner of speaking, of your time and effort in planning.
The Aesthetic Greenhouse
On the other hand, if your heart is set on creating a greenhouse that is simply beautiful to look at, then your layout might focus more on visual appeal and variety rather than pure profit. This does not mean it will not be productive, but the primary driver is creating a space that brings you joy every time you step inside. It's, arguably, a different kind of reward.
An aesthetic greenhouse might still include the 18 fruit trees, as they are quite lovely, and their summer sprites are always a nice touch. However, you might choose different types of fruit trees based on their appearance or the variety of fruits they offer, rather than just their selling price. It is, in fact, about personal preference for beauty.
For the 116 plant spots, you might opt for a wider range of crops, including flowers, different colored vegetables, or even decorative items if you are using mods. You could arrange crops in patterns or create distinct sections for different types of plants. The goal here is to create a visually appealing space, perhaps with a mix of colors and textures, too.
This approach allows for a lot more creative freedom. You might not maximize every single gold piece, but you will have a greenhouse that feels uniquely yours and is a pleasure to visit daily. It is, in some respects, about finding joy in the farming process itself, beyond just the monetary gains.
Considering filling your greenhouse with trellis crops, for example, can add a unique visual element, as they grow tall and provide a different kind of texture to the space. Whether you prefer a more aesthetic greenhouse or a more profitable one, it's really about aligning the layout with your personal farming style, you know.
Considering Trellis Crops
Trellis crops, like hops, grapes, or green beans, present a unique consideration for your greenhouse layout. These crops require a trellis for support, meaning you cannot walk through them once they are fully grown. This characteristic affects how you arrange your planting areas, as you need to ensure you can still reach all your crops for harvesting. It is, basically, a small planning challenge.
If you decide to incorporate trellis crops into your greenhouse, you will need to plant them in rows that allow for pathways between them. For instance, you might plant a row of trellis crops, then leave a clear path, then another row of trellis crops. This ensures you can access every plant without getting stuck, which is rather important for efficient harvesting.
Despite this requirement, trellis crops can be quite profitable, especially hops, which produce very frequently. They can be a good addition to either a profit-driven or an aesthetic greenhouse, depending on how you integrate them. Their tall growth also adds a distinct visual element, too, which some players really appreciate.
Many players find that a mix of trellis crops and regular crops works well, allowing them to benefit from the continuous production of trellis crops while still having plenty of space for other high-value items. It is, in a way, about finding a balance that suits your harvesting style and overall greenhouse vision.
The specific placement of these crops will impact your overall walking paths within the greenhouse. So, it is a good idea to sketch out your layout beforehand, especially if you are using a lot of trellis crops, to make sure you do not accidentally block yourself off from any plants. This bit of foresight can save you a lot of frustration, apparently.
Practical Tips for Greenhouse Management
Beyond the core layout, there are a few practical tips that can further enhance your greenhouse experience in Stardew Valley. These little strategies can help you manage your crops more efficiently and integrate your greenhouse seamlessly with the rest of your farm. They are, essentially, about making your daily farming routine a little bit smoother.
One very helpful thing to think about is how your greenhouse connects to the rest of your farm. Minimizing transit times, for instance, can save you precious in-game hours each day. This kind of efficiency adds up, allowing you more time for other activities or simply getting your farming tasks done earlier. It is, you know, about being smart with your time.
The people who use greenhouse love greenhouse because it delivers ROI at every turn, and this applies to Stardew Valley too. Every thoughtful decision you make about your greenhouse setup contributes to a better return on your effort. We build and innovate tools and features with intention, and in Stardew Valley, your intentional layout choices are your tools for success, basically.
Fertilizer Benefits
When you are looking to truly optimize your greenhouse, discussing the benefits of fertilizers is a must. Fertilizers can significantly improve the quality of your crops, leading to higher selling prices. This means more gold for the same amount of effort, which is, quite frankly, a very appealing prospect for any farmer. They are, in fact, a simple way to boost your earnings.
There are different types of fertilizers, each with its own advantages. Some increase the chance of producing higher quality crops (silver, gold, or iridium star produce), while others can speed up growth time. Using the best quality fertilizer, like Deluxe Fertilizer, can really make a difference in your overall profit margins from the greenhouse. It is, in a way, a small investment for a big payoff.
Applying fertilizer to your crops in the greenhouse is a straightforward process, but it needs to be done before you plant the seeds. Once applied, the benefits last for that particular crop cycle. This means you can consistently produce high-quality items, which is especially useful for those continuous-harvest crops that keep giving throughout the season. You will, apparently, see the difference in your earnings.
For a profit-driven greenhouse, using fertilizers is almost a necessity. It ensures that your valuable Ancient Fruit or Starfruit crops are always selling for their maximum potential. This small extra step in your planting routine can lead to significantly larger sums of gold over time, making your greenhouse even more lucrative, too.
The consistent environment of the greenhouse also means that your fertilized crops will always benefit from the boost, without worrying about rain washing away the effects or seasons changing. This reliability makes fertilizers a very dependable tool for maximizing your greenhouse's output. It is, you know, about taking every opportunity to improve your yield.
Farm Layout Synergy
Thinking about how your greenhouse interacts with the rest of your farm layout can also lead to greater efficiency. While the greenhouse itself is an enclosed space, its proximity to other important farm buildings can save you a lot of time each day. This synergy between different parts of your farm is, basically, about creating a smooth workflow.
For example, when I was playing on the forest farm, I would put the big sheds directly under the entrance to the greenhouse. This arrangement helped to minimize transit times between my greenhouse, where I harvested crops, and my sheds, where I might process them into artisan goods or store them. It is, actually, a very practical way to save a few precious in-game minutes.
Having your sheds or other processing buildings close by means you can quickly move your harvested fruits and vegetables to preserve jars, kegs, or other machines without long walks across your farm. This kind of thoughtful farm planning makes your daily routine much more efficient and less tedious. It is, in a way, about making your farm work smarter, not harder.
Consider placing your shipping bin close to the greenhouse entrance as well, or a mini-shipping bin
Related Resources:

Detail Author:
- Name : Trace Feeney
- Username : monique18
- Email : rosemary62@padberg.com
- Birthdate : 1986-04-05
- Address : 618 D'Amore Mount New Billhaven, FL 57968-4847
- Phone : 414-419-1801
- Company : Schimmel, Collins and Kessler
- Job : Rotary Drill Operator
- Bio : Illum non nihil nesciunt aut rerum tempora sint. In sunt in est saepe distinctio dolorem. Autem tempora sed necessitatibus quia et voluptatibus atque.
Socials
tiktok:
- url : https://tiktok.com/@cletus.jacobs
- username : cletus.jacobs
- bio : Ea saepe pariatur amet molestiae porro enim.
- followers : 2704
- following : 742
instagram:
- url : https://instagram.com/cletus.jacobs
- username : cletus.jacobs
- bio : Et maiores sequi delectus veritatis. Repellendus minima maxime exercitationem recusandae rerum.
- followers : 3392
- following : 1182
linkedin:
- url : https://linkedin.com/in/cletusjacobs
- username : cletusjacobs
- bio : Voluptatem recusandae veniam consectetur odit.
- followers : 6790
- following : 1952
twitter:
- url : https://twitter.com/cletus_jacobs
- username : cletus_jacobs
- bio : Et est omnis et nisi animi. Modi voluptas modi consequatur nemo minima labore optio. Eos est eum illo doloribus.
- followers : 1507
- following : 1024
